

As the wiring loom for the bora vents is now almost impossible to get hold of I decided to make my own, here is a short how to on the procedure involved.
![Image]()
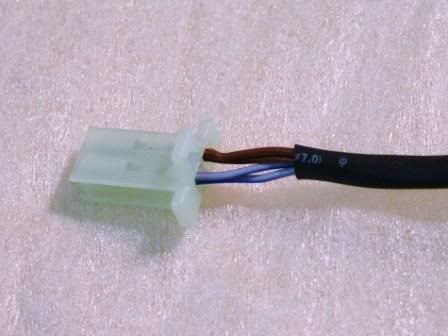
The loom can be made utilising the original plug circled above, (part number 1J0 973 119) but you will need to purchase the corresponding sockets from VW (part number 1J0 973 332) and three repair wires for the terminals (part number 000 979 132), at the time of writing this the plugs were unavailable so I had to use another method. I decided to replace the plugs on the vents to enable me to create the loom rather than just splicing the vent wiring directly into the cars wiring system behind each vent.
The materials needed: bought from Vehicle Wiring Products of Ilkeston near Derby
3m Thin wall Blue/Slate wire 1mm - 26p/m
3m Thin wall Brown wire 1mm - 26p/m
3 x 2-Way 2.8mm Mini Connector (If you are not using VW part 1J0 973 332)- 60p each
http://i65.photobucket.com/albums/h208/old_n07/ventloom/replacementplug.jp
g
3m Black braided sleeve (5 - 7mm) - 72p/m
Cloth Tape (or you could use insulation tape) - £2.47
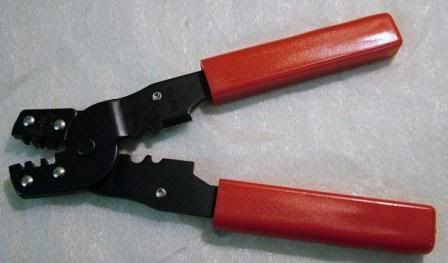
Crimping Tool (If you don't have one already) - £8.55
![Image]()
Spare terminals for the connectors in case of mistakes 10 of each - £2.00 (total)
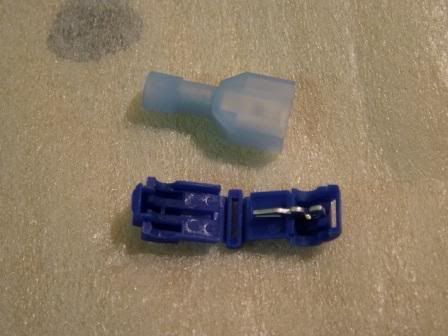
Tap connector x 2 (splice with blade connector) - 0.15p each
![Image]()
![Image]()
Earth Ring (un insulated crimp ring terminal pk of 10) - £1.00
This comes to £12.10 + P&P without the crimping tool.
The principals for making the loom are the same if you are using original plugs or the replacements, the only difference will be is that you won't have to change the plug on the end of each vent lead. If you do change the plugs on the vents then crimp on the female connectors to the cables and put them into the male portion of the plug assembly ensuring to keep the orientation of the colours the same in each plug.
![Image]()
Note: With the latch on top the blue wire is to the left when the plug is viewed from the rear, I used this orientation on all the vent plugs then matched the sockets to it.
![Image]()
![Image]()
To make the loom cut lengths of the two cables corresponding to the above measurements and thread braided sleeve over them. Wind the cloth tape around the ends of the braid to stop it fraying but leave enough wire exposed to make up the connections.
Use the male connectors and the female sockets to make up the cable to the above diagram, on the plug on the far left there is only one brown and one blue cable but the other plugs will have two of each cable in them. Ensure you match the orientation of the wires in these plugs to the ones on the end of the vent wires.
On the free end of the final cable cut the braided sleeve back 25cm and on the end of the brown wire (earth) crimp on the ring terminal, on the blue/grey wire crimp on the connector to go with the tap splice.
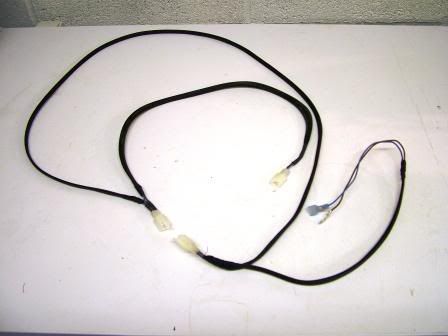
You should end up with this:
![Image]()
Feed the cable behind the dash securing it out of the way with cable ties and connect each vent plug up as you install them to the plug on the loom.
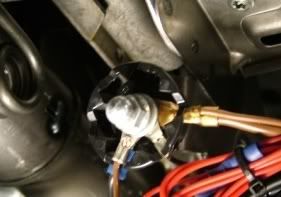
Connect the earth connection to the earthing terminal under the dash by the steering column:
![Image]()
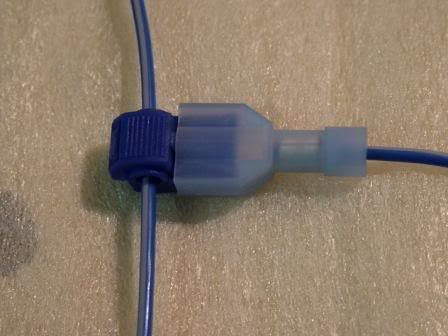
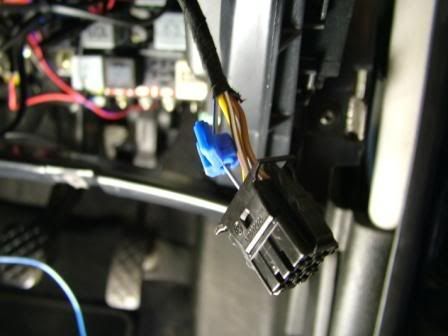
Clamp the splice to the blue/grey wire that comes out of the dash light dimmer switch then connect the wire from the loom to the splice, this connectioned is the variable output from the dimmer so the vents will dim with the rest of the dash lights.
![Image]()
Connect the plug back up to the dimmer switch and give the vents a test.
![Image]()
If you have a W8 light aswell (or thinking of adding one later) you could put a fourth connector in near to the right hand side of the loom to connect the illumination wire to.[Y]
Plug part numbers:

The part numbers to make up the wiring adaptor for the W8 light are as follows:
(Courtesy of Wazzer)
<o ></o>
></o>
For the W8 adaptor loom you need to look at each plug and the numbers that correspond to the wire slots.

W8 light install
Removing the golf vents:

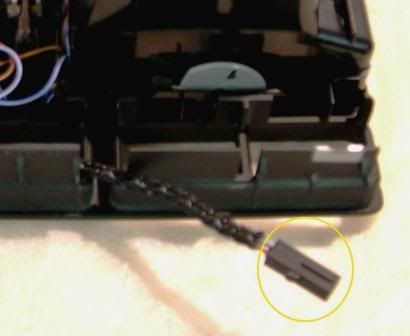
The loom can be made utilising the original plug circled above, (part number 1J0 973 119) but you will need to purchase the corresponding sockets from VW (part number 1J0 973 332) and three repair wires for the terminals (part number 000 979 132), at the time of writing this the plugs were unavailable so I had to use another method. I decided to replace the plugs on the vents to enable me to create the loom rather than just splicing the vent wiring directly into the cars wiring system behind each vent.
The materials needed: bought from Vehicle Wiring Products of Ilkeston near Derby
3m Thin wall Blue/Slate wire 1mm - 26p/m
3m Thin wall Brown wire 1mm - 26p/m
3 x 2-Way 2.8mm Mini Connector (If you are not using VW part 1J0 973 332)- 60p each
http://i65.photobucket.com/albums/h208/old_n07/ventloom/replacementplug.jp
g
3m Black braided sleeve (5 - 7mm) - 72p/m
Cloth Tape (or you could use insulation tape) - £2.47
Crimping Tool (If you don't have one already) - £8.55
Spare terminals for the connectors in case of mistakes 10 of each - £2.00 (total)
Tap connector x 2 (splice with blade connector) - 0.15p each
Earth Ring (un insulated crimp ring terminal pk of 10) - £1.00
This comes to £12.10 + P&P without the crimping tool.
The principals for making the loom are the same if you are using original plugs or the replacements, the only difference will be is that you won't have to change the plug on the end of each vent lead. If you do change the plugs on the vents then crimp on the female connectors to the cables and put them into the male portion of the plug assembly ensuring to keep the orientation of the colours the same in each plug.
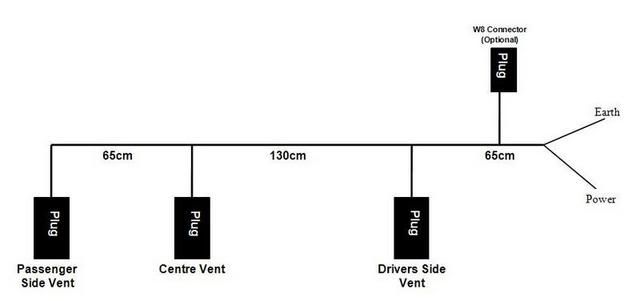
To make the loom cut lengths of the two cables corresponding to the above measurements and thread braided sleeve over them. Wind the cloth tape around the ends of the braid to stop it fraying but leave enough wire exposed to make up the connections.
http://i65.photobucket.com/albums/h208/old_n07/ventloom/replacementplug-
1.jpg
1.jpg
Use the male connectors and the female sockets to make up the cable to the above diagram, on the plug on the far left there is only one brown and one blue cable but the other plugs will have two of each cable in them. Ensure you match the orientation of the wires in these plugs to the ones on the end of the vent wires.
On the free end of the final cable cut the braided sleeve back 25cm and on the end of the brown wire (earth) crimp on the ring terminal, on the blue/grey wire crimp on the connector to go with the tap splice.
You should end up with this:
Feed the cable behind the dash securing it out of the way with cable ties and connect each vent plug up as you install them to the plug on the loom.
Connect the earth connection to the earthing terminal under the dash by the steering column:
Clamp the splice to the blue/grey wire that comes out of the dash light dimmer switch then connect the wire from the loom to the splice, this connectioned is the variable output from the dimmer so the vents will dim with the rest of the dash lights.
Connect the plug back up to the dimmer switch and give the vents a test.

If you have a W8 light aswell (or thinking of adding one later) you could put a fourth connector in near to the right hand side of the loom to connect the illumination wire to.[Y]
Plug part numbers:

The part numbers to make up the wiring adaptor for the W8 light are as follows:
(Courtesy of Wazzer)
Repair wire<o ></o> | 000 979 131<o ></o> | 2 needed<o ></o> |
Adaptor plug for existing loom<o ></o> | 893 971 993<o ></o> | 1 needed<o ></o> |
Repair wire<o ></o> | 000 979 103<o ></o> | 2 needed<o ></o> |
W8 light plug<o ></o> | 3B0 972 706<o ></o> | 1 needed<o ></o> |
<o
></o>For the W8 adaptor loom you need to look at each plug and the numbers that correspond to the wire slots.
Adaptor Socket<o ></o> | <o > </o> | W8 Plug<o ></o> | <o > </o> |
3<o ></o> | à<o ></o> | 4<o ></o> | <o > </o> |
2<o ></o> | à<o ></o> | 5<o ></o> | <o > </o> |
1<o ></o> | à<o ></o> | 3<o ></o> | <o > </o> |
<o > </o> | <o > </o> | 1<o ></o> | wire runs down to fuse box for +ve feed or to vent loom<o ></o> |

W8 light install
Removing the golf vents: